You want a putting green in the backyard. You’re handy. You’ve got weekends and ambition. The question is whether a DIY putting green is realistic — and the honest answer is: it depends on what you’re building.
A flat practice green with a couple of holes? Absolutely doable. A contoured, multi-hole green with realistic break? That’s a different animal.
This guide walks through the full process either way, so you can decide where your skills and patience land on the spectrum.
Planning Your Green
Before you buy a single material, spend time on the plan. The decisions you make here determine whether you end up with a useful practice surface or an expensive patch of short turf.
Size
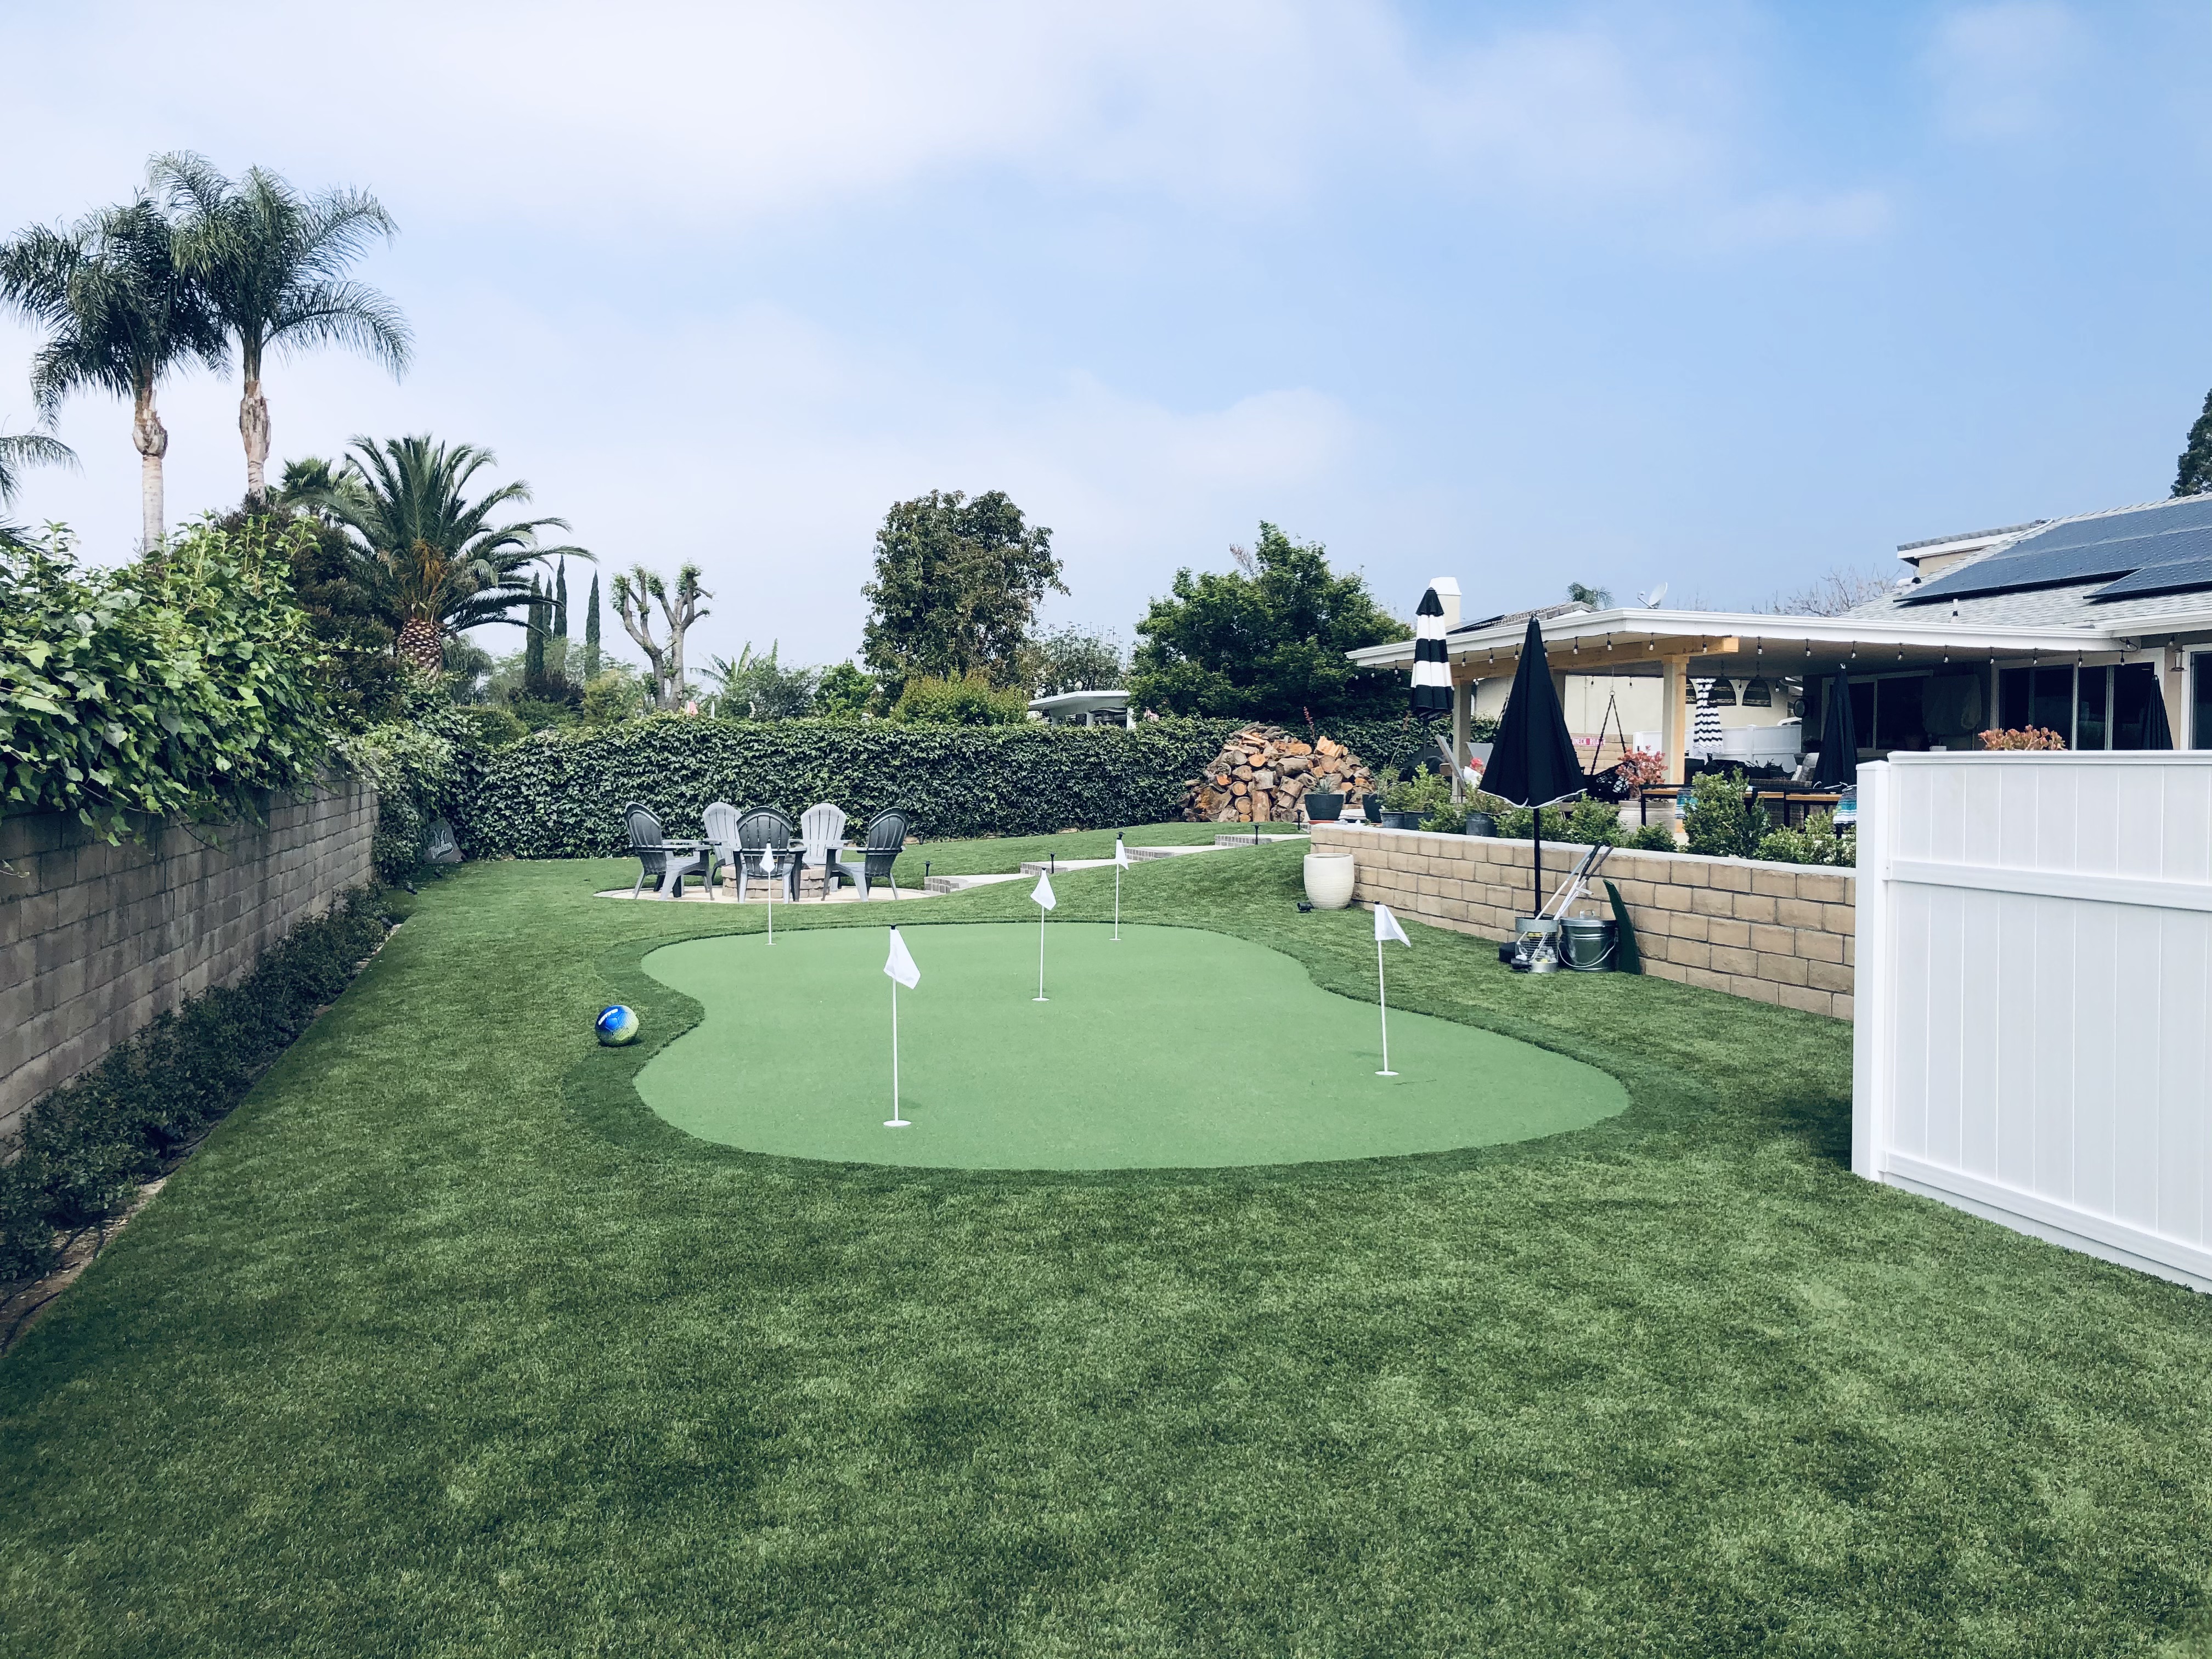
Minimum practical size: 100 to 150 square feet. That gives you a single hole with putts from 6 to 15 feet in different directions. It’s small, but it’s genuinely useful for stroke practice.
Sweet spot for DIY: 200 to 400 square feet. Two to three holes, enough room for 10 to 25-foot putts, and manageable for one or two people to build in a weekend or two.
Going bigger: Anything over 500 square feet significantly increases the labor, materials, and precision required. Multi-hole greens with contouring start to demand professional-grade equipment and experience.
Location
Pick a spot that’s relatively flat to start with. A level or gently sloping area reduces the earthwork you need to do. Extreme slopes require retaining walls or significant grading — that’s where DIY gets complicated.
Sun exposure matters less for turf (it’s artificial, it doesn’t need sunlight to grow), but it matters for your comfort. A green in full afternoon sun during a DFW summer is usable in the morning and evening but miserable at 2 PM.
Proximity to the house keeps it convenient. A green you can see from the patio or kitchen window gets used more than one hidden in the back corner.
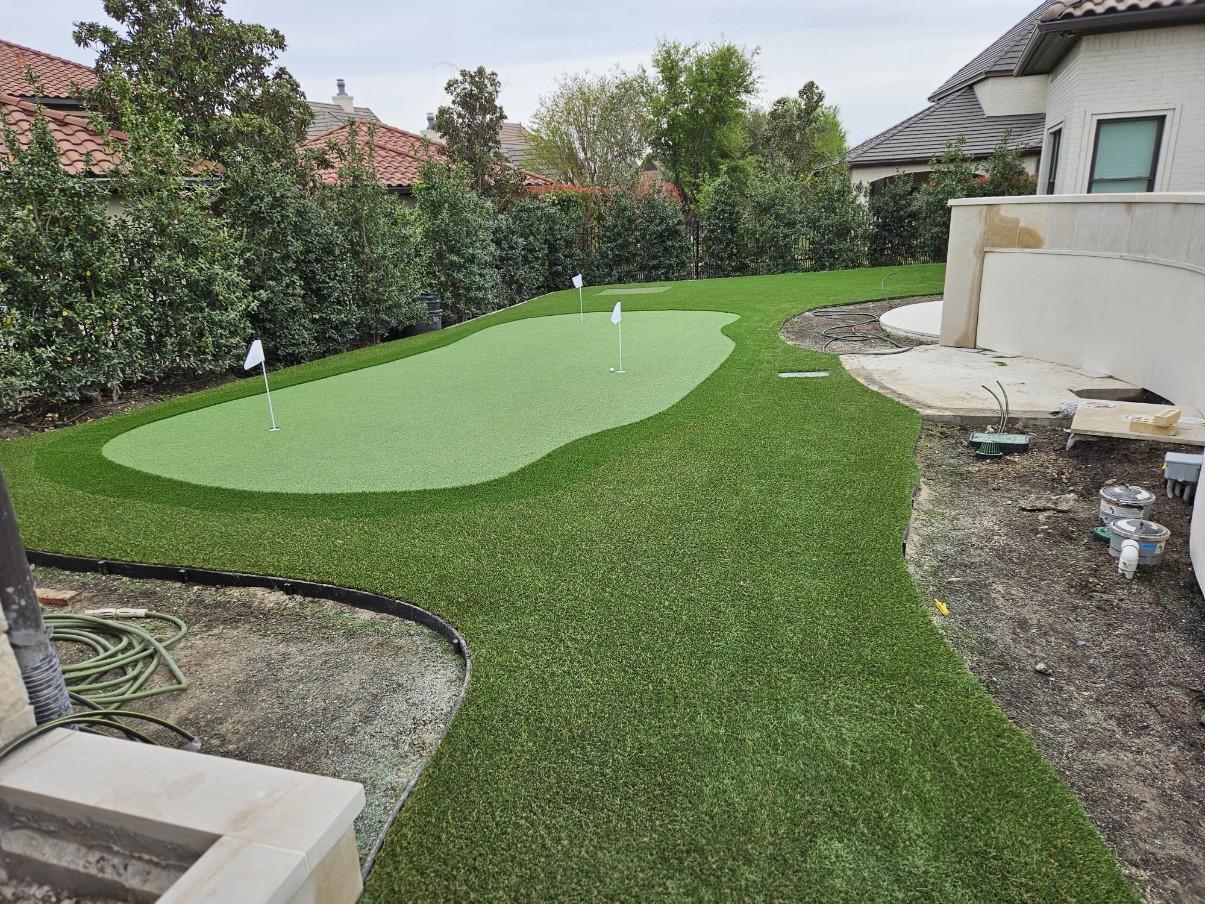
Shape
Simple shapes are easier to build. Rectangles, ovals, and kidney shapes all work well for DIY. Complex free-form shapes with lots of curves require more cutting, more seaming, and more edge work.
For inspiration on shapes and layouts, take a look at our backyard putting green ideas.
Materials You’ll Need
Here’s your shopping list for a basic DIY putting green.
Putting green turf. Look for a product specifically designed for putting greens — not standard residential turf. Putting green turf has a shorter pile height (0.80 inches is the standard), tighter stitch density, and a surface that allows consistent ball roll. Standard landscape turf is too tall and too soft for putting.
Crushed rock or decomposed granite. This is your base material. You’ll need enough to create a 2 to 3-inch layer across the entire green area.
Commercial-grade weed barrier fabric. Goes down before the base rock to prevent weed growth.
Infill. Silica sand is the standard for putting greens. The amount of infill directly affects the speed of the green — this is your primary tuning tool.
Edging. Aluminum bender board or steel edging to define the green perimeter.
Putting cups and flags. Regulation cups are 4.25 inches in diameter. Buy the plastic insert type that sits flush with the turf surface.
Seaming tape and adhesive. If your green requires multiple panels.
Landscape spikes. 5 to 6-inch galvanized nails for securing edges.
Tools: Plate compactor or hand tamper, shovel, rake, utility knife, tape measure, string line, level, drop spreader, stiff broom.
Step-by-Step Build Process
Step 1: Mark and Excavate
Outline your green shape with spray paint or string line. Excavate 3 to 4 inches deep within the outline. Remove all grass, roots, rocks, and organic material.
For putting cups, dig deeper holes at your planned pin positions — about 6 inches deep and 6 inches wide. You’ll set the cups in these during final installation.
Step 2: Install Weed Barrier
Lay commercial-grade weed barrier fabric over the entire excavated area. Overlap seams by at least 6 inches. This prevents weeds from growing up through your green.
Step 3: Set Your Edging
Install your aluminum or steel edging around the perimeter. The top of the edging should sit at your desired finish height — flush with the surrounding lawn or landscape.
Stake the edging firmly. It defines the shape of your green and contains the base material, so it needs to be solid.
Step 4: Lay and Compact the Base
Spread crushed rock or decomposed granite to a depth of 2 to 3 inches. Rake it smooth.
Compact with a plate compactor — make at least three passes. The surface should be hard enough that you can walk on it without leaving footprints.
Grade the base so water moves away from any low spots. A slight slope of 1% to 2% prevents pooling. For a putting green, the grade needs to be subtle enough that it doesn’t noticeably affect ball roll.
This is where you check your level repeatedly. An uneven base shows through the turf as bumps and dips that ruin the putting surface.
Step 5: Add Contour (The Hard Part)
If you want a flat practice green, skip this step. The compacted base is your surface.
If you want break — the left-to-right and right-to-left slope that makes putting challenging — you need to shape the base layer with mounds, ridges, and valleys.
Here’s where DIY gets genuinely difficult. Creating realistic break requires understanding how a putt reads on a real green, building the underlying topography in crushed rock, compacting it to hold its shape, and making the transitions smooth enough that the turf lays flat over them.
Small mounds (1 to 2 inches of elevation change over 3 to 4 feet) create subtle break. Larger mounds create dramatic slopes. The goal is gradual, realistic movement — not a bumpy roller coaster.
Pack and repack. Walk the surface. Roll a ball across the bare base to see how it moves. Adjust until the contour feels right.
Honest assessment: This step is where professional installation makes the biggest difference. Mark A. Du Pont’s 30+ years of competitive golf experience — including multiple USGA competitions and representing Team USA at the Mercedes-Benz World Cup in Germany — means he understands what makes a green play well. Building contour that translates into realistic putting practice takes golf knowledge, not just construction skill.
A flat green built by a capable DIYer will serve you well for years. A contoured green built by a golfer who knows break and speed will make you better.
Step 6: Roll Out the Turf
Lay the putting green turf across your prepared base. The grain (blade direction) should face your primary putting direction — typically toward the house.
Let the turf acclimate in the sun for 20 to 30 minutes before cutting. It relaxes the backing and conforms better to the base contours.
If you need multiple panels, lay them with grain running in the same direction. Mismatched grain creates visible color differences.
Step 7: Cut and Seam
Trim the turf to fit your green shape, cutting from the back side with a sharp utility knife. Follow the stitch lines for clean cuts.
For seams between panels, butt the edges together so blades interlock naturally. Apply seaming tape and adhesive underneath. Press the joint firmly and let it cure before walking on it.
Cut holes for your putting cups. Place the cup from below, pushing it up through the turf so the rim sits flush with the surface.
Step 8: Secure the Perimeter
Nail the turf edges down with landscape spikes every 6 to 8 inches around the perimeter. Drive spikes through the turf backing into the base material, close to the edging.
Step 9: Apply Infill and Tune Speed
Here’s where your green becomes a green.
Spread silica sand infill using a drop spreader. Start with a light application — you can always add more, but removing excess is harder.
Brush the infill into the fibers with a stiff broom, working against the grain.
Speed tuning:
- **Less infill = faster green.** The ball rolls more freely on the turf fibers with less resistance.
- **More infill = slower green.** The sand creates friction that slows the ball.
- **Rolling the surface** with a lawn roller after infill compresses the fibers slightly and creates a smoother, more consistent surface.
Start with moderate infill and roll a few putts. Adjust from there. Getting the speed right is an iterative process — add a little, putt, add a little more, putt again.
For reference, the optimal pile height for putting green turf is 0.80 inches. The infill level within that pile height is your speed dial.
Step 10: Final Inspection
Walk every inch of the green. Check for bumps, dips, loose edges, or visible seams. Roll putts across the entire surface. Check that the cups are level and secure.
If something doesn’t look or feel right, fix it now. Small issues become permanent if you start using the green without addressing them.
Realistic Timeline and Budget

Timeline for a 200-400 sq ft DIY green:
- Planning and material sourcing: 1 to 2 days
- Excavation and base prep: 1 to 2 days
- Turf installation and infill: 1 day
- Total: 2 to 4 weekends, depending on your pace
Budget:
Putting green turf runs $3 to $6 per square foot for materials. Base rock, weed barrier, infill, edging, and cups add another $2 to $4 per square foot. Total material cost for a 300 sq ft DIY green: roughly $1,500 to $3,000, not including tool rentals.
Compare that to professional installation, which runs $14 to $20+ per square foot but includes expert contouring, warranty, and a finished product that’s ready for serious practice.
When to Go Pro
A flat or gently sloped practice green is a satisfying DIY project. If you’re comfortable with basic landscape construction and you’re patient with the details, you’ll end up with a green that gets daily use.
A contoured green with realistic break, multiple holes, chipping zones, and fringe areas is a professional putting green installation. The skill gap between a flat surface and a playable contoured surface is significant, and the finished product reflects that difference every time you putt.
No shame in either path. Pick the one that matches your goals and your honest assessment of the project scope.
Ready to see what artificial turf can do for your yard? Call us at 844-91-GREEN (844-914-7336) or request a free quote.