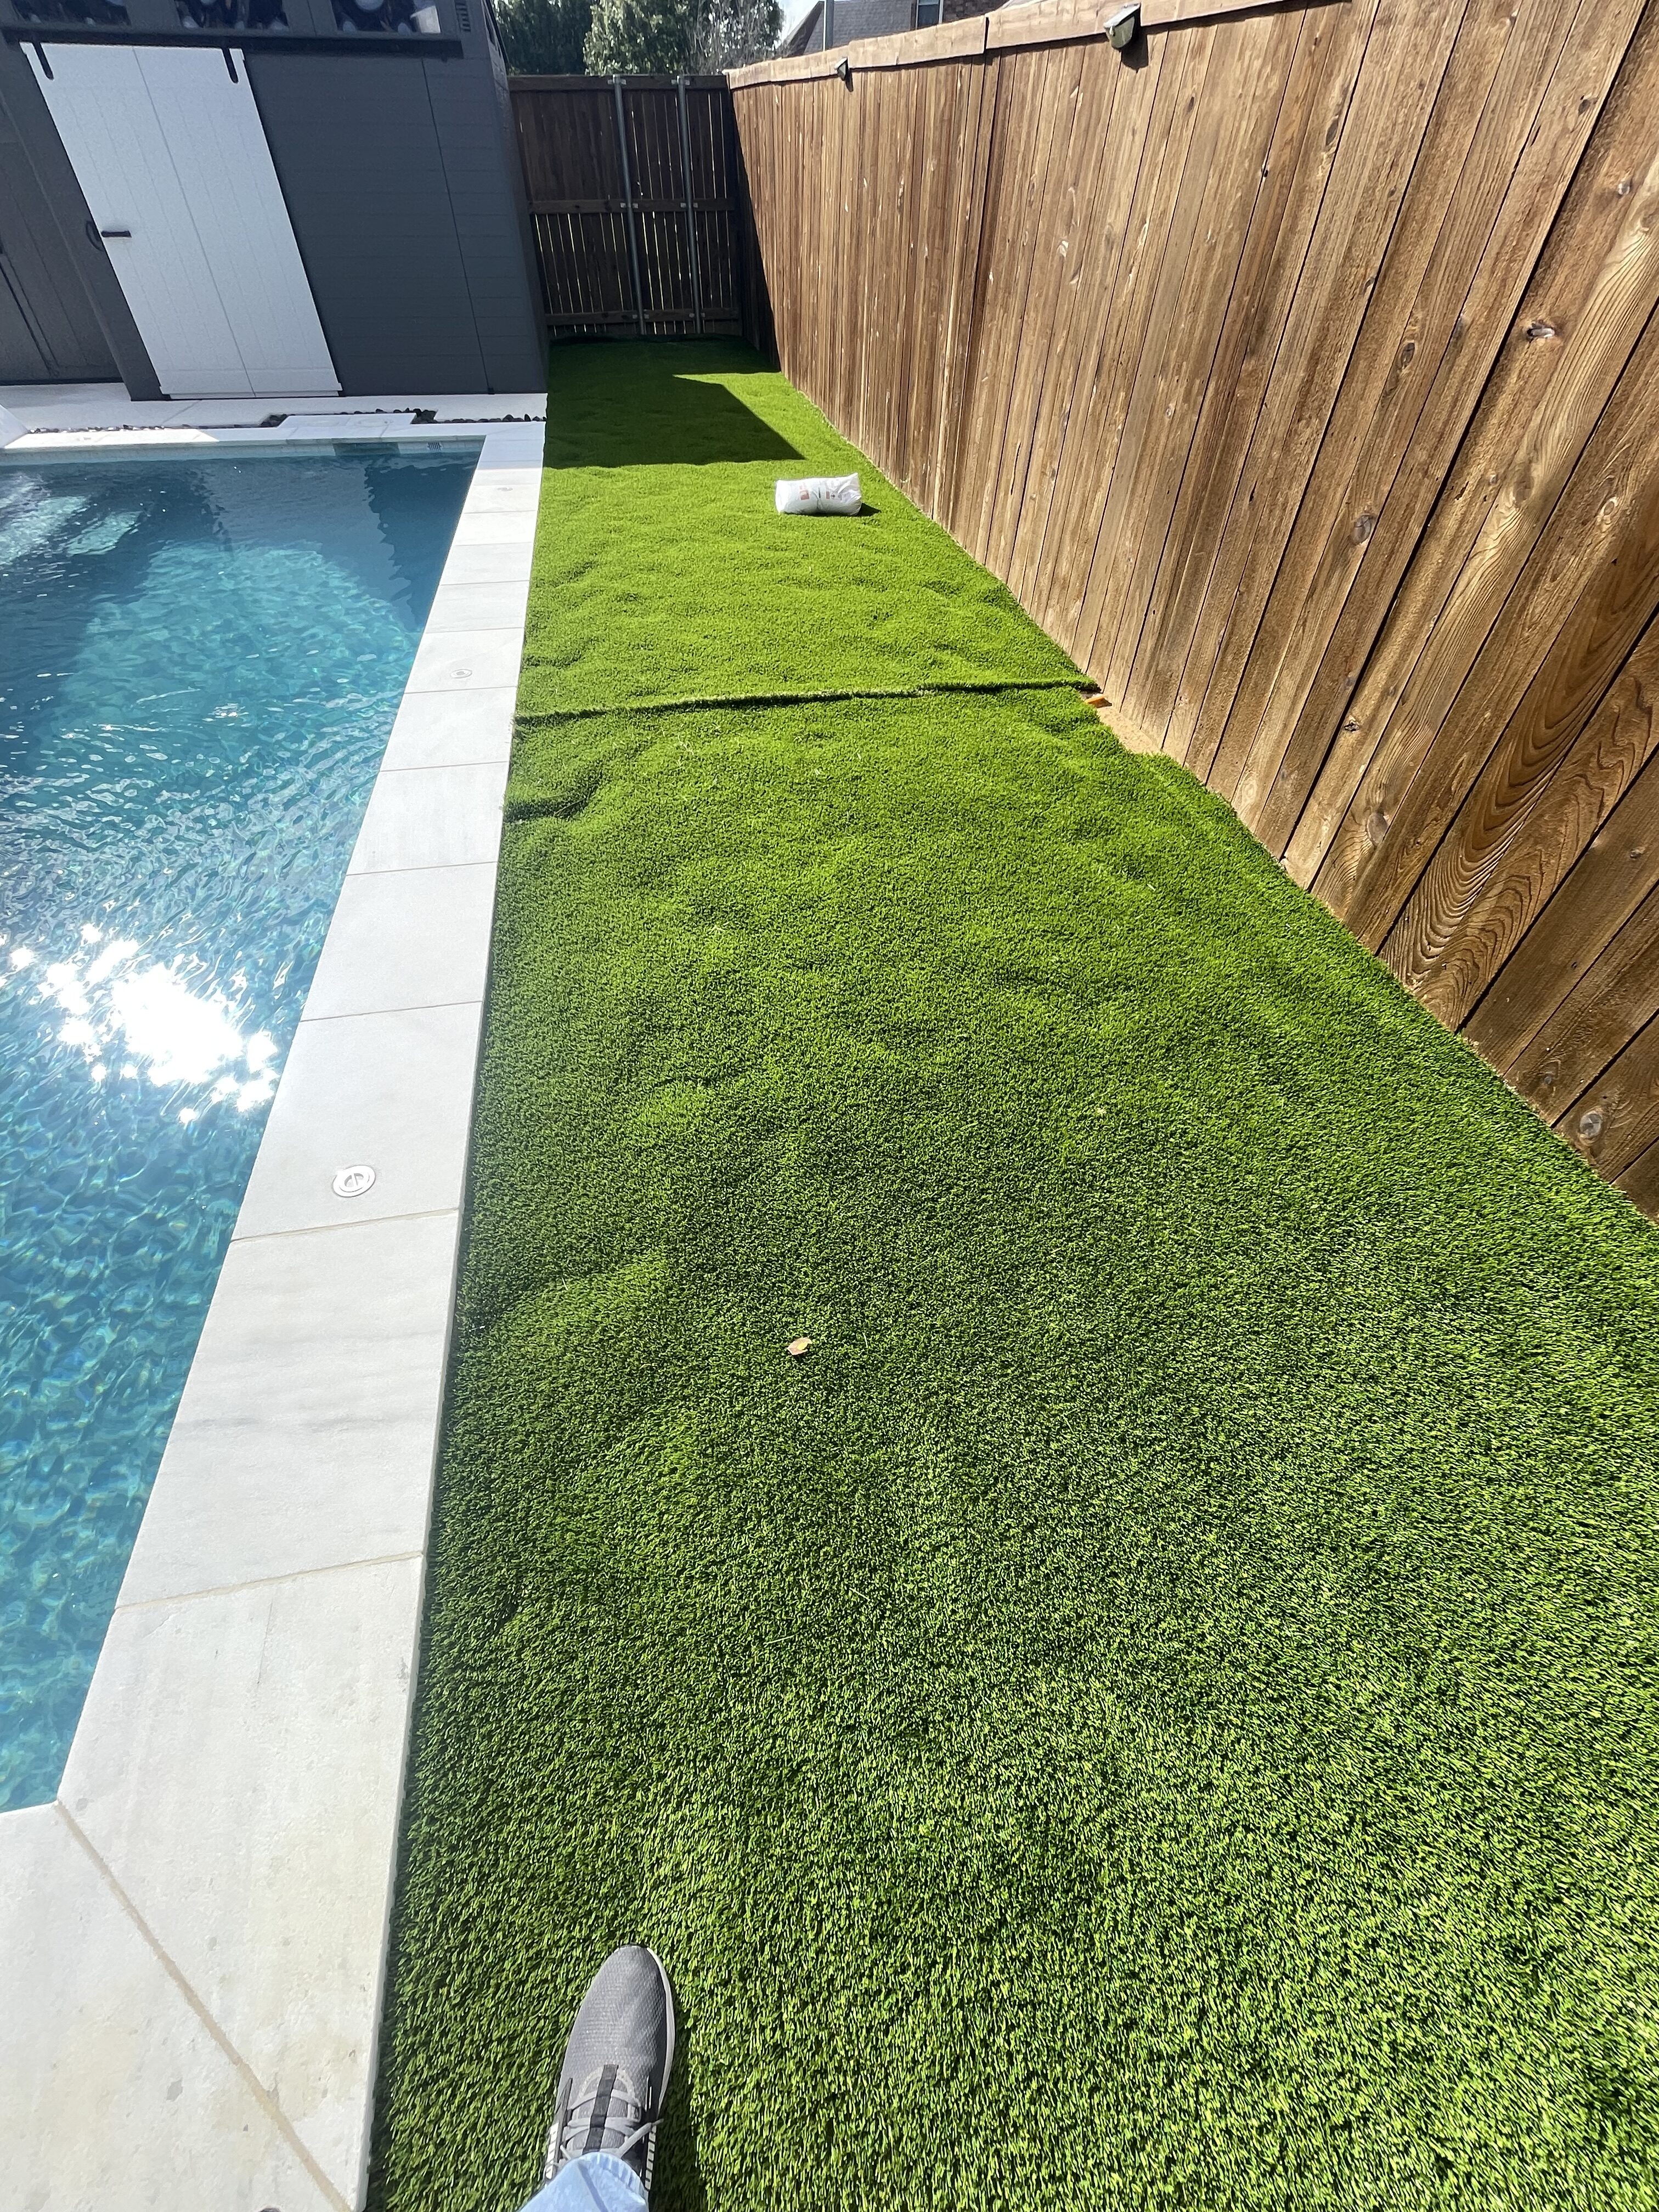
Concrete patios, pool decks, rooftop terraces, balconies — they all have one thing in common. They’re hard, hot, and not exactly inviting for bare feet. Artificial grass over concrete changes that.
The good news: installing artificial grass on concrete is one of the simpler turf projects. The hard surface is already there. No excavation. No base rock. No compaction. Here’s how it works.
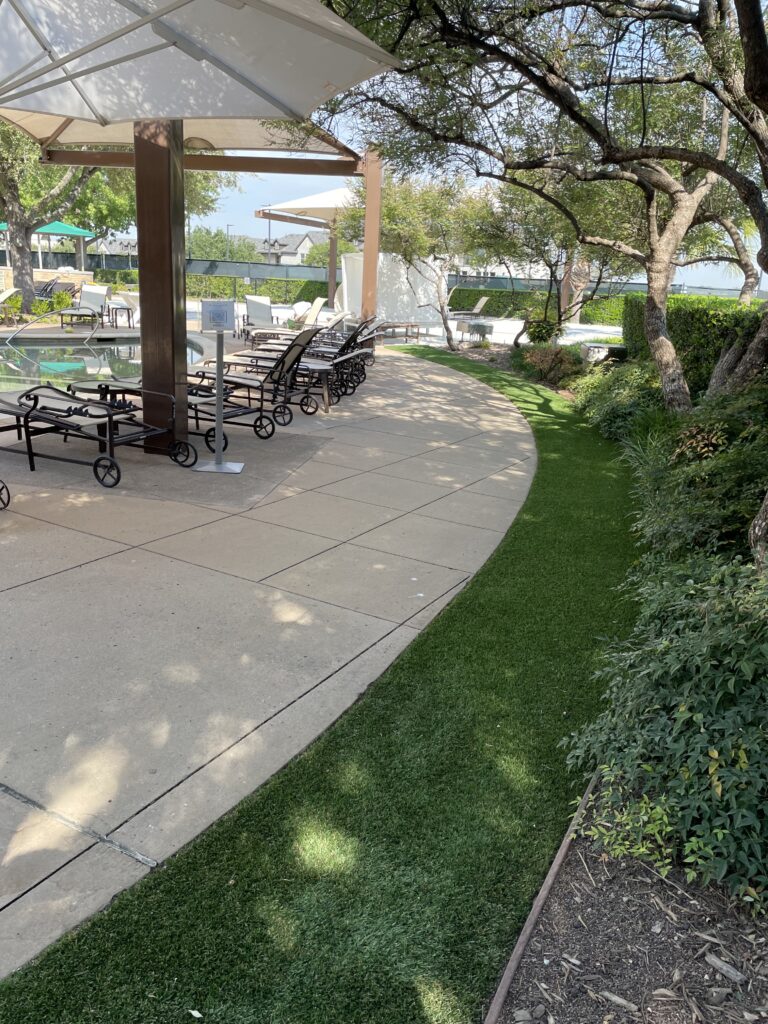
Why Install Turf Over Concrete?
Concrete absorbs heat. In a DFW summer, a concrete patio can hit 140°F or higher by mid-afternoon. That’s not comfortable to walk on barefoot, and it radiates heat into your outdoor space all evening.
Artificial turf with up to 20% cooling technology stays significantly more comfortable underfoot. It won’t be cold — nothing is cold in a Texas July — but the difference between bare concrete and turf-covered concrete is noticeable.
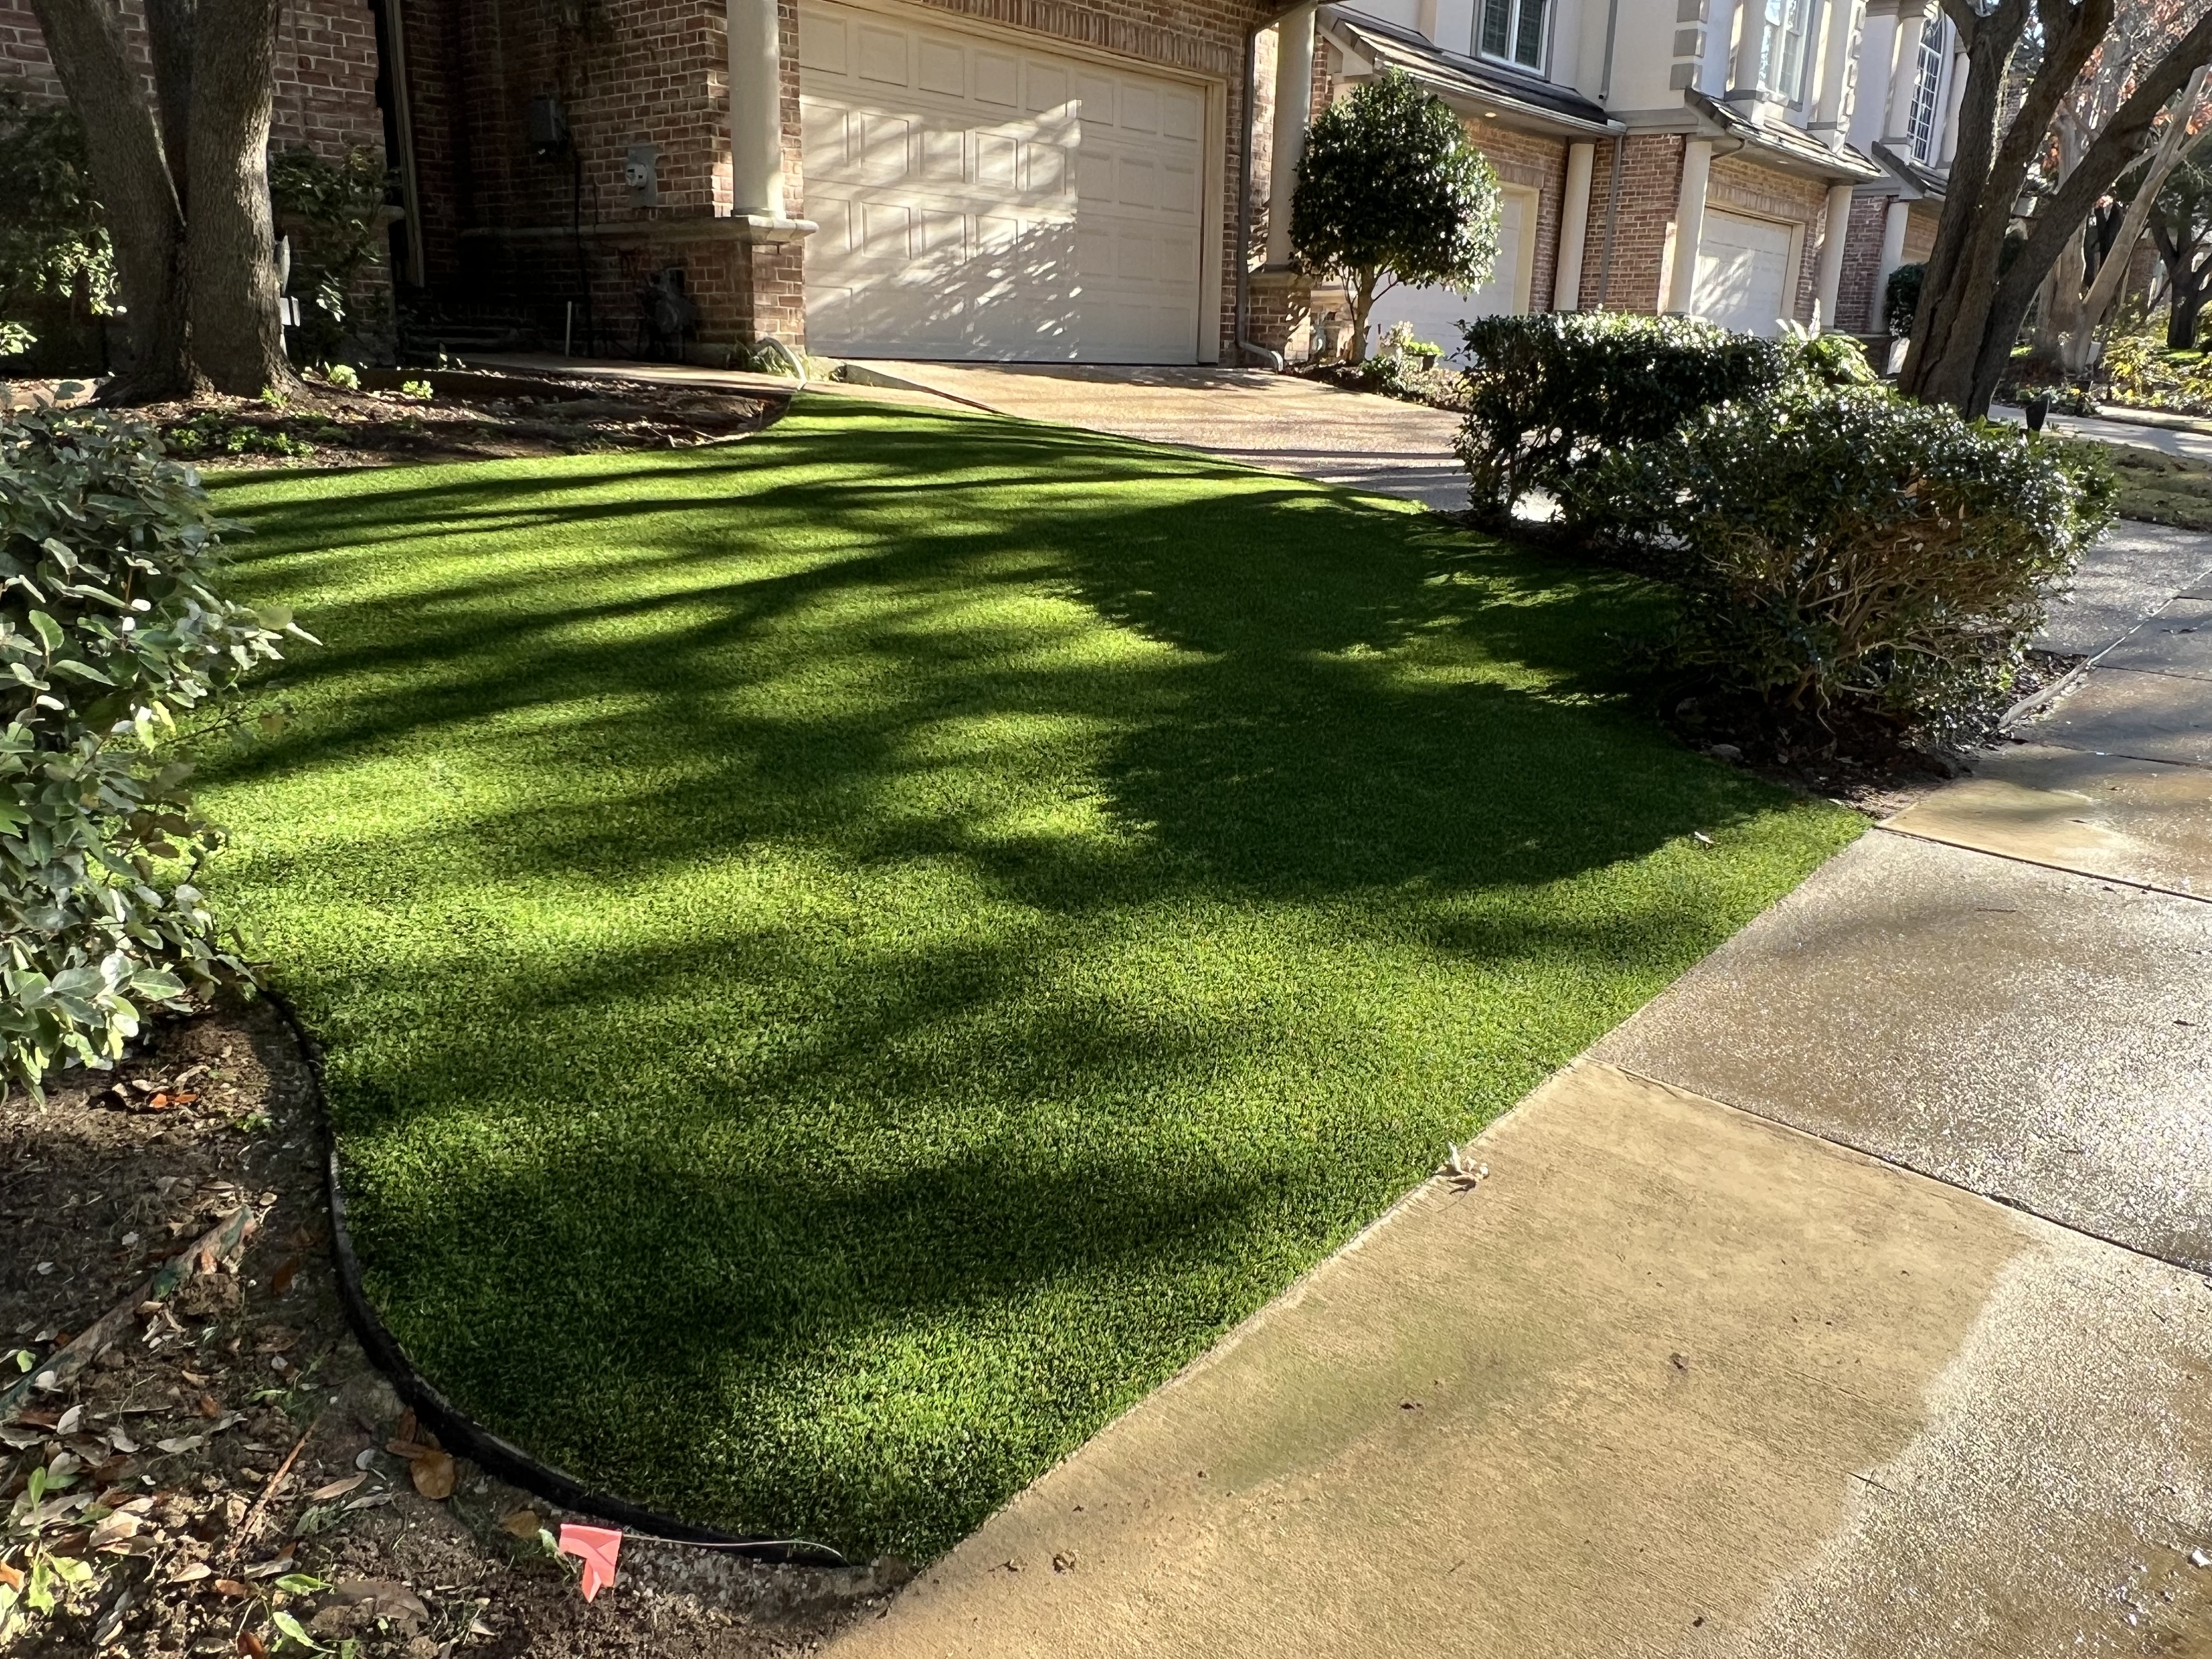
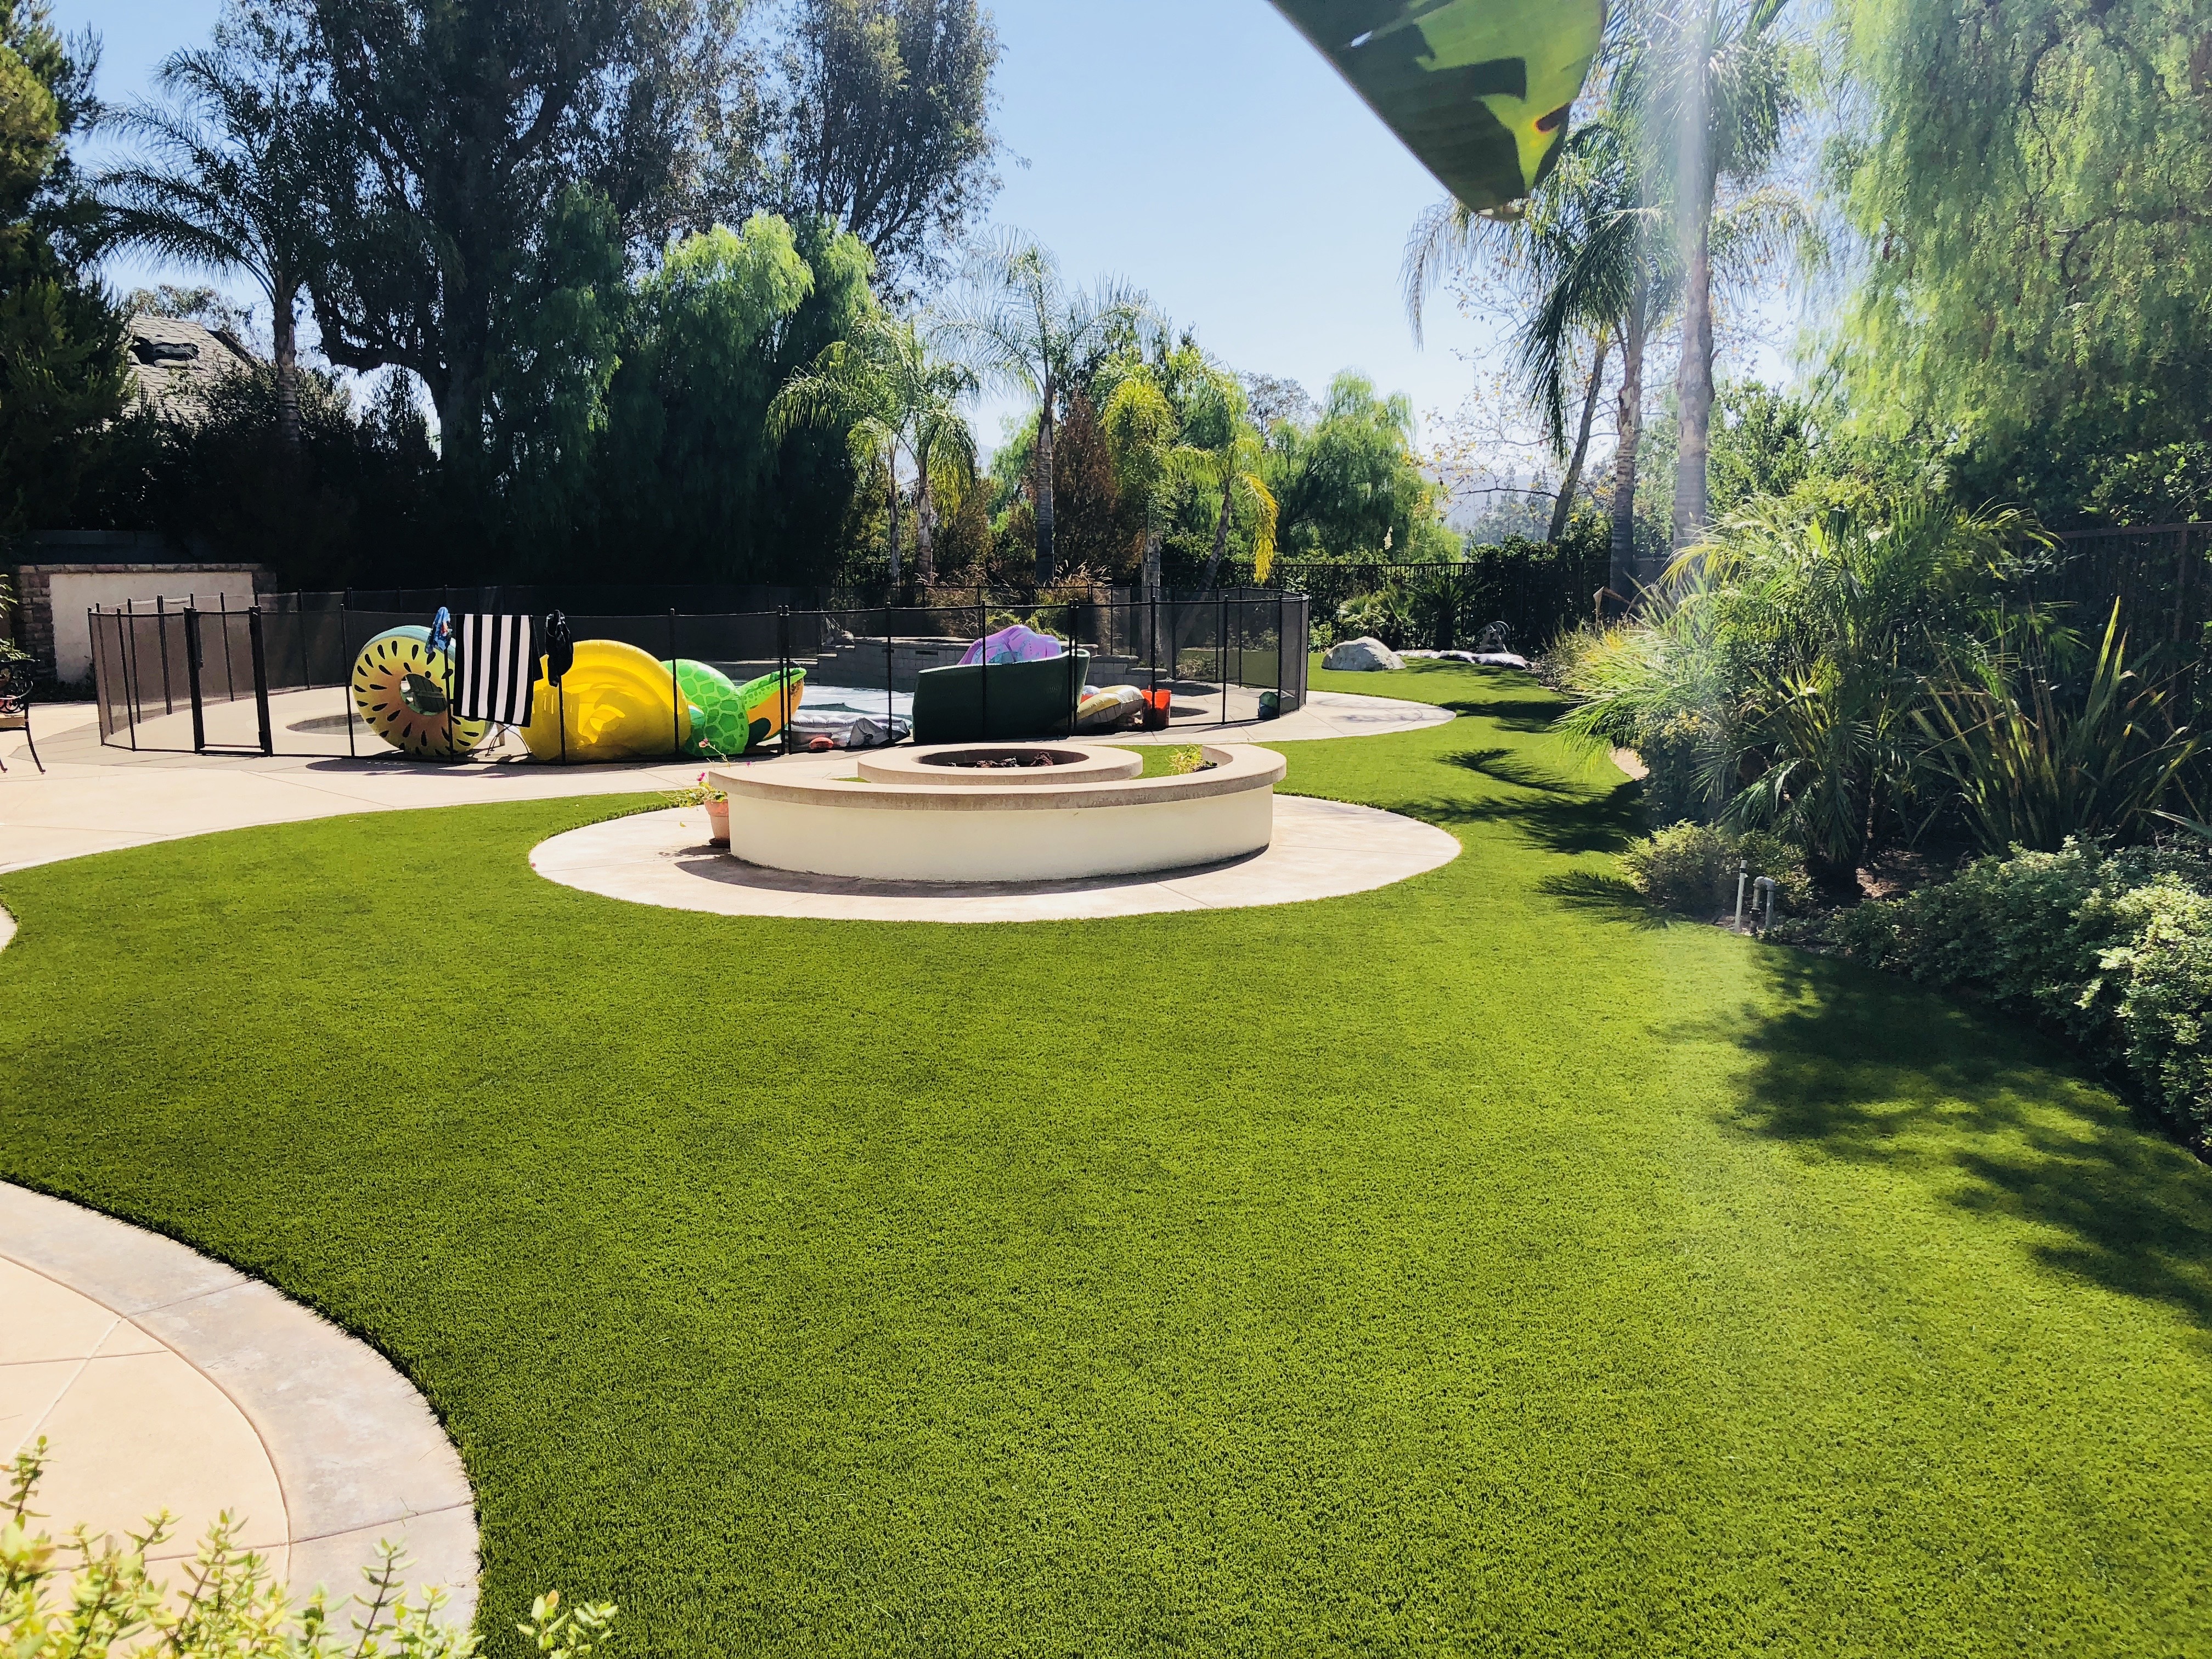
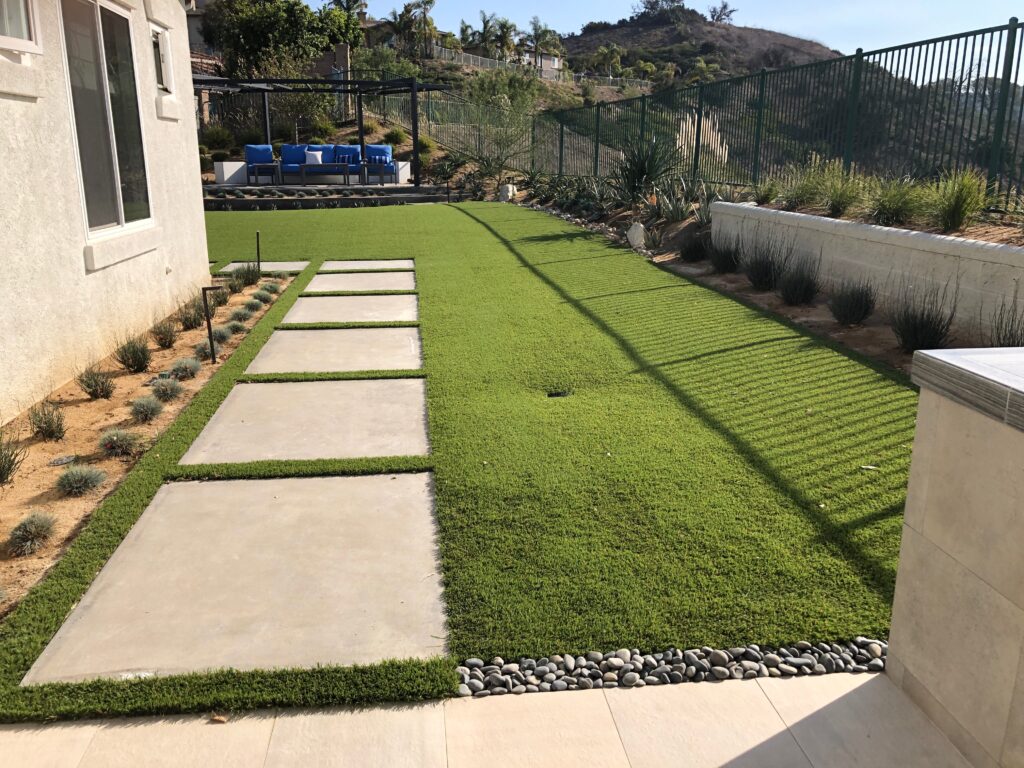
Beyond temperature, turf transforms the look and feel of a space. A gray concrete slab becomes a green, soft surface that looks like a yard — even on a second-floor balcony or a rooftop patio.
Popular uses include apartment and condo balconies, rooftop terraces in Dallas and Fort Worth, pool surrounds, covered patios, commercial outdoor spaces like office patios and restaurant seating areas, and indoor-outdoor living rooms that extend through sliding doors.
Step 1: Clean the Concrete
Start with a clean surface. Sweep off all dirt, debris, and loose material. Power wash if the concrete is stained, has mildew, or has a layer of grime.
Let it dry completely. You don’t want to trap moisture between the concrete and the turf — that creates conditions for mold and mildew over time.
If the concrete has major cracks, chips, or uneven sections, patch them with a concrete repair compound. The turf will conform to the surface below it, so bumps and dips in the concrete will show through.
Step 2: Check the Drainage
Drainage on concrete works differently than drainage on a prepared base.
On dirt, water passes through the turf backing, through the base rock, and into the ground. On concrete, water passes through the turf backing and hits a hard surface. It needs somewhere to go.
Concrete with a slope — even a slight one — naturally directs water toward a drain or off the edge. Most patios and pool decks are already sloped for exactly this reason. If your concrete has adequate slope, drainage is handled.
Flat concrete with no slope needs drainage holes. These are small holes drilled through the concrete at regular intervals — typically every 4 to 6 feet — that allow water to pass through to the ground or a drainage system below.
If you’re on a balcony or rooftop, the existing drainage system is your path. Make sure the turf doesn’t block floor drains or gutter channels.
Step 3: Lay a Foam Pad (Optional but Recommended)
For patios, play areas, and any surface where comfort matters, a foam pad underlayment between the concrete and the turf makes a real difference.
The pad adds cushion underfoot, absorbs impact (important for kid play areas), and provides a small amount of thermal insulation between the hot concrete and the turf above.
Foam pads come in rolls that you cut to size. Lay them across the concrete with edges butted together — no overlap. Secure with adhesive or double-sided tape.
For areas where drainage is critical, use a perforated foam pad that lets water pass through.
This step isn’t mandatory. Turf can go directly on concrete with adhesive alone. But if you’re walking, playing, or sitting on the surface, the pad is worth it.
Step 4: Roll Out and Position the Turf
Unroll your turf across the concrete. Let it sit in the sun for 20 to 30 minutes to relax and flatten out. Turf that’s been rolled up will have a slight curl — the Texas heat straightens it fast.
Position the turf so the grain (the direction the blades lean) faces your primary viewing angle. This is usually toward the house or toward the seating area. Turf looks most natural when the blades lean toward you.
If the area requires multiple pieces, lay them with the grain running the same direction. Inconsistent grain direction creates visible color differences between panels.
Step 5: Trim the Edges
Using a sharp utility knife, trim the turf to fit the concrete edges. Cut from the back side of the turf — it’s easier to see the stitch lines, and you get a cleaner cut.
Leave about a quarter inch of gap between the turf edge and any wall, post, or raised border. This allows for slight expansion in heat and prevents bunching.
For curves, posts, or irregular shapes, make relief cuts (small slits) so the turf lays flat without wrinkling.
Step 6: Secure the Turf
On concrete, you’re not using nails or spikes. You’re using adhesive.
Apply turf adhesive around the perimeter of the concrete, about 3 to 4 inches from the edge. Add adhesive lines or spots across the middle of the area every 12 to 18 inches to keep the turf from shifting.
For seams between multiple panels, use seaming tape with adhesive underneath. Press the edges together and let the adhesive cure before walking on the seam.
Some installations use a combination of adhesive and landscape anchors around the edges, depending on the specific setup.
Step 7: Add Infill and Brush
Spread infill across the turf using a drop spreader. For a concrete installation, you typically use less infill than a ground-based install — just enough to weight the turf down and keep the blades upright.
Brush the infill into the fibers with a stiff broom or power broom, working against the grain. This distributes the infill evenly and gives the turf its finished look.
Where This Gets Popular in DFW
Concrete-over-turf installations are growing fast across the Metroplex. A few setups we see regularly:
Pool surrounds in Southlake, Prosper, and Plano. Turf replaces the standard concrete or travertine pool deck with a surface that’s cooler, softer, and doesn’t get slippery when wet.
Apartment and condo balconies in Dallas and Fort Worth. Renters and owners transform small outdoor spaces into usable green retreats.
Covered patios across North Texas. That slab under your pergola or patio cover goes from gray and utilitarian to green and inviting.
Commercial patios for restaurants, breweries, and office buildings. A turf patio creates an outdoor seating area that’s low maintenance and visually appealing year-round.
Common Questions
Will the turf get hot on concrete? It will warm up in direct sun — everything does in a Texas summer. Turf with cooling technology keeps it more manageable than bare concrete, but shaded areas will always be more comfortable. Covered patios and pergolas make a big difference.
How long does it last? Quality turf on concrete holds up just as well as turf on a standard base. It carries the same 15-year warranty.
Can I remove it later? Yes. Because it’s adhered to the concrete rather than built into a base system, turf on concrete can be removed and the concrete returned to its original state. It’s not a permanent structural change.
Does it affect concrete drainage? Not if the installation is done correctly. Water passes through the turf, and the existing concrete slope moves it toward drains. No pooling, no damage.
One Surface, Completely Transformed
Installing artificial grass on concrete is a simple project with a big impact. No digging, no base prep, no heavy equipment. Clean the slab, lay the turf, glue it down, and you’ve got a surface that looks and feels completely different.
Ready to see what artificial turf can do for your yard? Call us at 844-91-GREEN (844-914-7336) or request a free quote.